Five Easy Fall Crafts for Cozy Homes
When you are thinking of ways to decorate your home in festive fall flair, consider the picture frame—a commonly overlooked item that can be used for many fall decorating ideas. Whether it’s simply painting a frame in beautiful fall colors or using the frame itself as the centerpiece, here are five fun kid-friendly fall craft ideas—all using picture frames.
Nature-Inspired Picture Frames

Materials:
Picture frame
Acorns, pinecones, leaves
Hot glue gun
Photograph
Take advantage of all those leaves, acorns and pinecones that are taking over your yard this fall, and use them for this fall craft for kids. Go on a nature hike, and while enjoying the beautiful weather, collect fallen acorns, pinecones and even leaves.
Pick a plain frame with a clean surface, and hot glue your finds directly onto the frame. Once dried, take your favorite family portrait (or any picture you desire) and display.
Pressed Leaves

Materials:
Leaves
Wax paper
Mat board
Heavy books
Newspaper or scrapbook paper
Frame
Mod Podge
Even though this fall craft idea takes a bit more time, it will add an elegant fall touch to your home. Find pretty leaves outside and place them in between two pieces of wax paper. Take the sheets of wax paper with the leaves in them and place between the pages of a heavy book. Next, stack heavy books on top of the first book, and let it set for a week.
While the leaves are drying out and flattening, measure a piece of newspaper or scrapbook paper so that it will fit your chosen frame and mat board. Once the leaves are dry, flat and ready to go, choose one and carefully paste it onto your newspaper or scrapbook paper using Mod Podge.
Don’t forget to measure out the placement of the leaf to ensure it will be directly centered in the middle of the mat board. Once the paper is dry, insert the finished project into the frame.
A Frame for Gratitude

Materials:
Empty frame
String (twine, yarn, etc.)
Tape
Construction paper
Clothespins
Marker
A grateful attitude
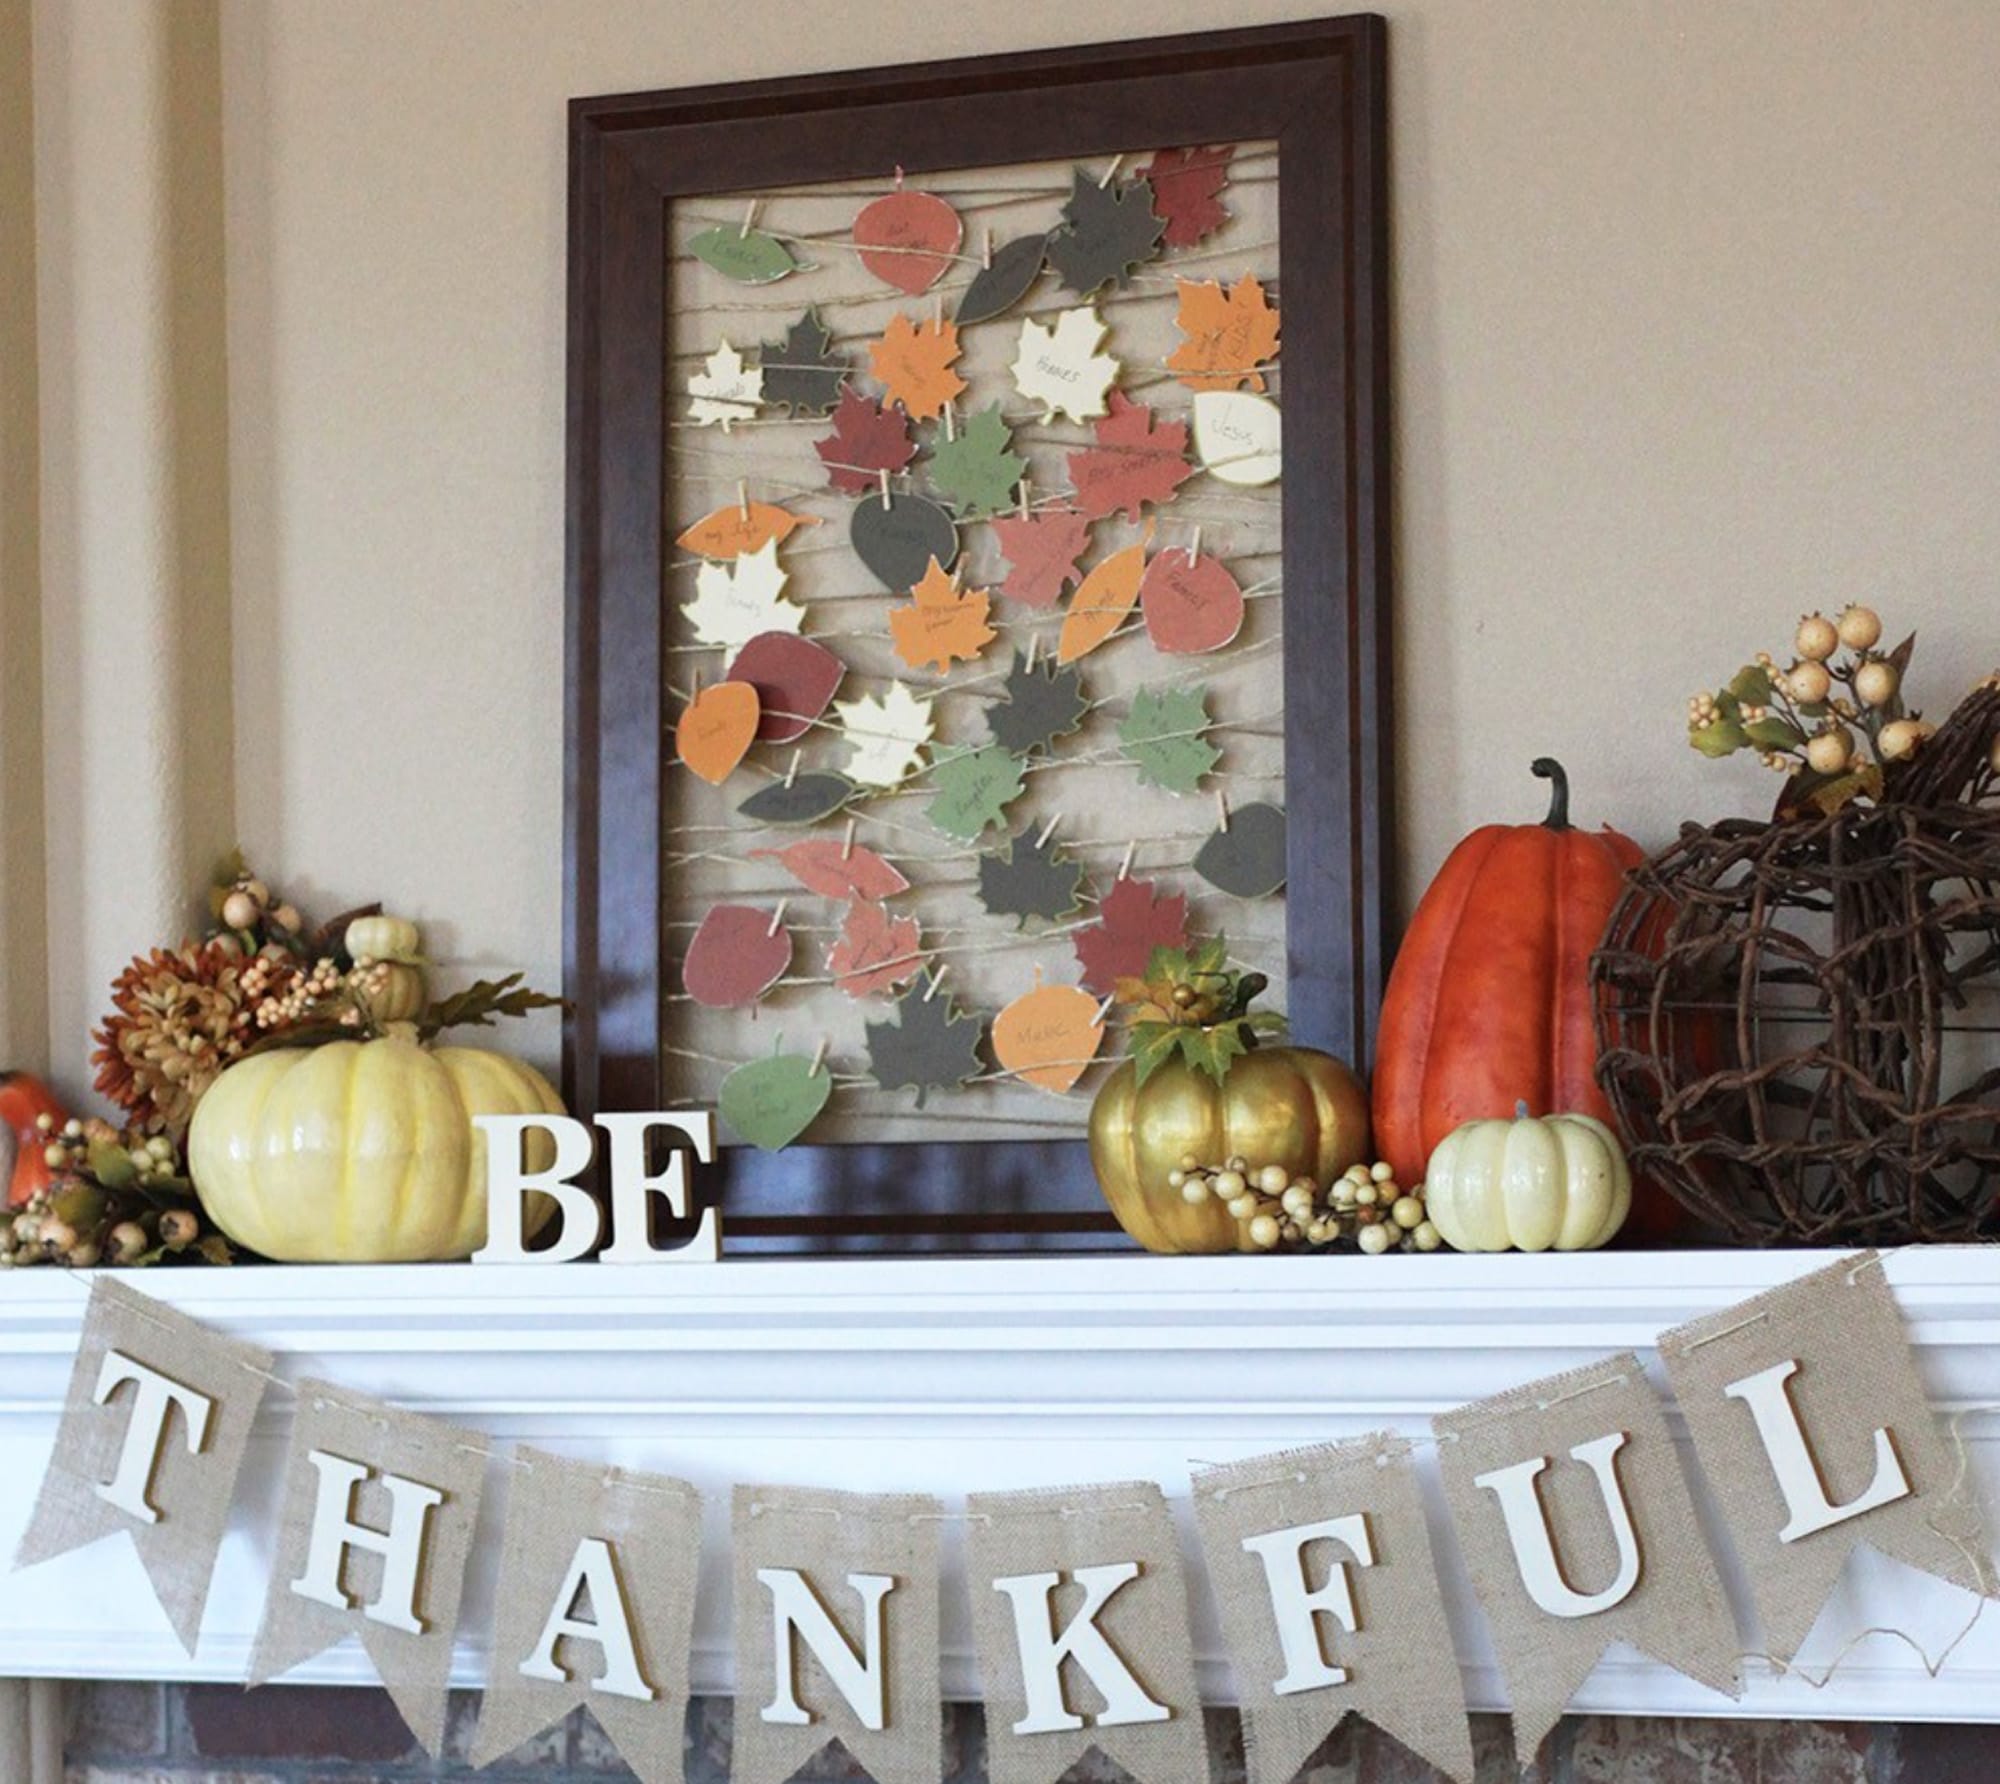
This fall craft can be a fun, ongoing project for the entire family. Not only is it nice to look at, but it’s a great way to bring the family together to discuss what everyone is grateful for right up to Thanksgiving.
Take an open frame and tape twine in a zig-zag pattern onto the back. Next, take construction paper in fall leaf colors and either draw leaves free hand or use this pattern, and then cut the leaves out.
Each day, have every family member write down a few things they are grateful for on each of the leaves. Hang each leaf onto the frame using clothespins. Place on a mantle or other high-traffic area of your home to be reminded of all the things your family is grateful for this year.
Turkey Frames

Materials:
Hot glue gun
Googly eyes
Brown paint
Paintbrushes
Feathers
Foam sheets
Plain wooden frame
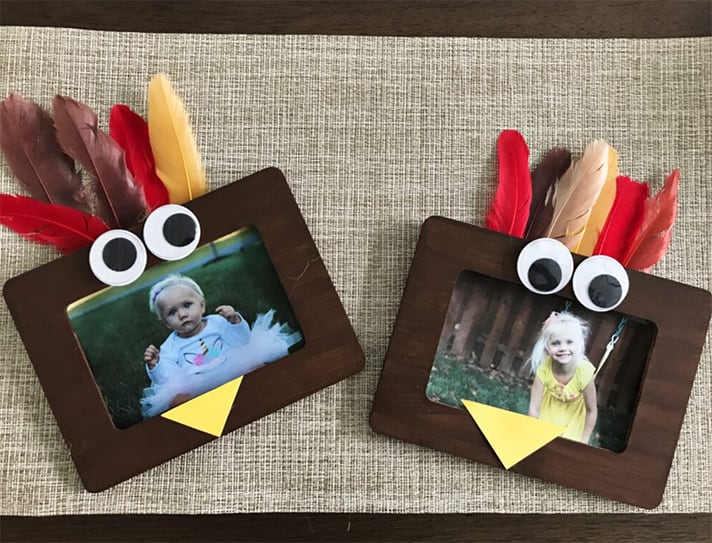
The finished product of these turkey frames may just be cute enough to replace your real turkey as the centerpiece on Thanksgiving Day. Paint a plain wooden frame brown; once the paint is dry, use a hot glue gun to glue feathers on the back of the frame (leaving space to insert a picture) and “googly” eyes on the front for the turkey’s eyes. Take either a yellow or red foam sheet, cut out a small triangle, and then glue that to the bottom of the frame under the glass. Once the glue has dried, insert your favorite holiday photo.
Festive Fall Wreath
Materials:
Picture frame
Two different colors of spray paint
Wood letters
Fall foliage (real or artificial)
Cinnamon sticks
Ribbon
Hot glue gun
Staple gun (recommended, but not required)
For this fall craft, the frame is the centerpiece of the finished product. It’s inexpensive and easy to make, and it adds a cozy and festive fall element to your front door.
Take a plain wooden frame without the glass and spray paint the frame in a color that will pop against your front door. Once the paint has dried, glue the leaves, acorns or other fall foliage, the cinnamon sticks (for a festive fall smell!) onto the frame. This can be either in the corners or on the sides of the frame.
Take a wooden letter (for your first name, last name, or whatever you’d like) and spray paint the letter with the other color of spray paint you purchased. Glue it onto the bottom left-hand corner of the picture frame once dry.
Lastly, either staple or glue the ribbon onto the back of the frame, making a loop. Hang on your door and enjoy!
Related Posts
DIY Framed Chalkboard
DIY Holiday Shadow Boxes